Through a good amount of trial and error last year I figured out how to construct an evaporator to boil down our maple sap on the cheap. Then I forgot how I did it. So this year I’m documenting the construction.
This plan uses about a dozen concrete blocks and was designed to fit the 5-gallon buffet pans which I use to hold the sap. These are the same style pans you see at Chinese buffets holding the cream cheese wontons. It’s not as efficient as production-scale evaporators, but does the job. And the price is right (free, in my case).
Step 1
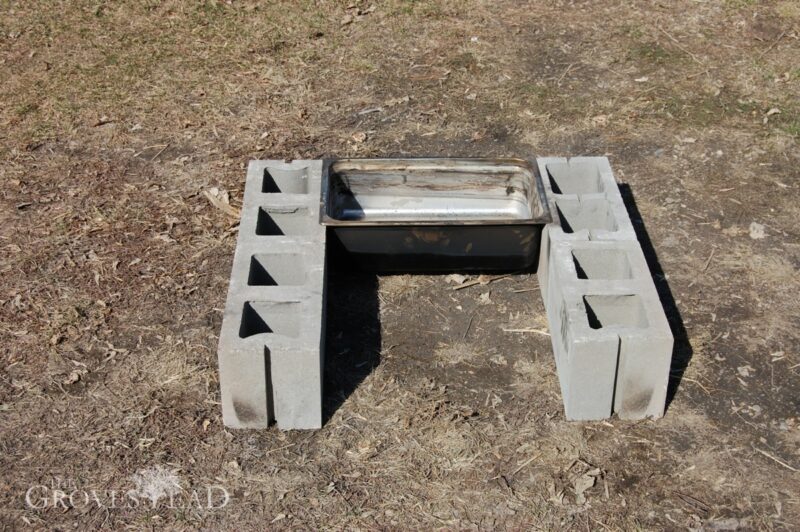
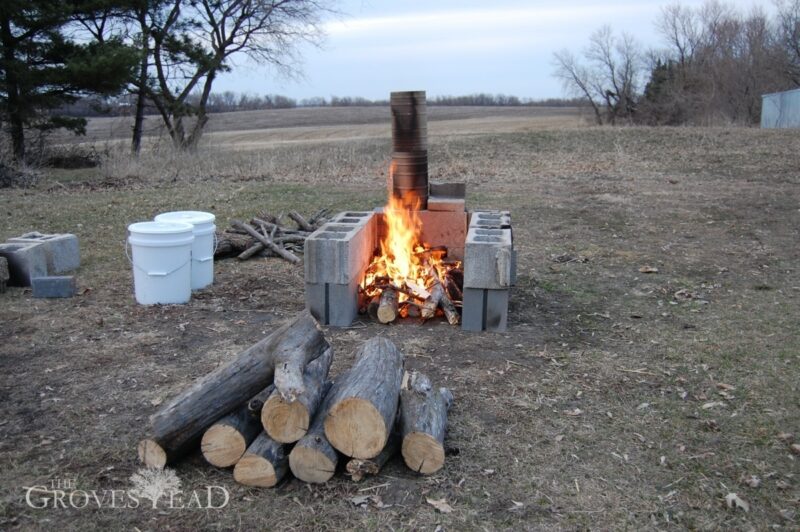
Find a level site that won’t be growing anything for the next 24-36 months. Layout the first layer of block to the width of the pan.
Step 2
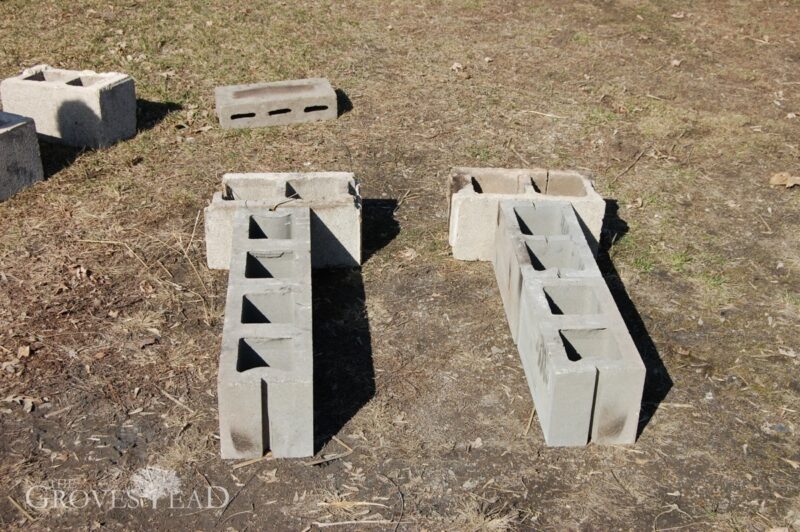
Align rear blocks to leave a gap for the chimney block. You might want to set the rear blocks up on spacers so the exhaust intake is higher off the ground (this will make more sense later).
Step 3
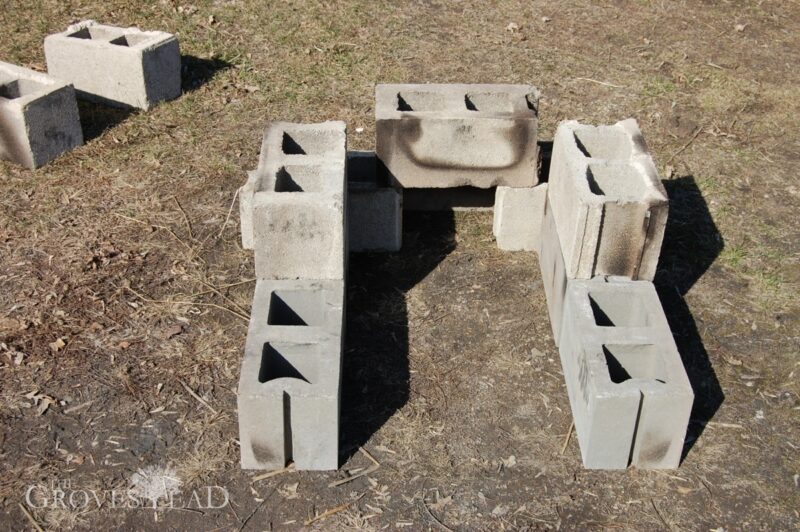
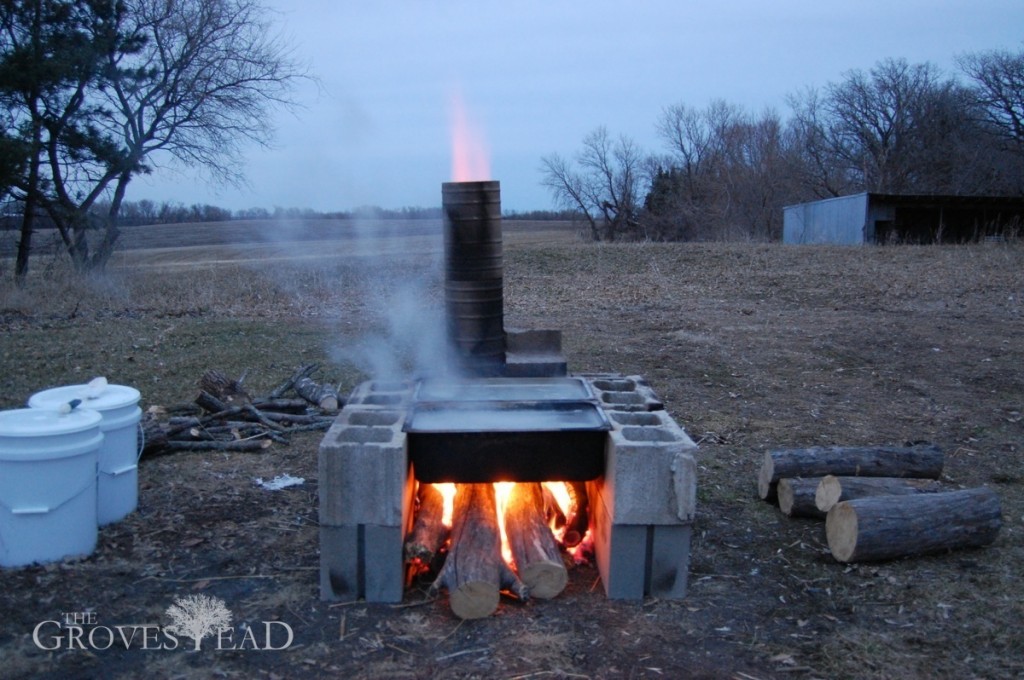
Add the second layer of blocks on top of the first. I built this evaporator to accommodate two pans, but you could easily extend it to support three. One block (the chimney) should span the two rear blocks so that you see straight through to the ground from the top.
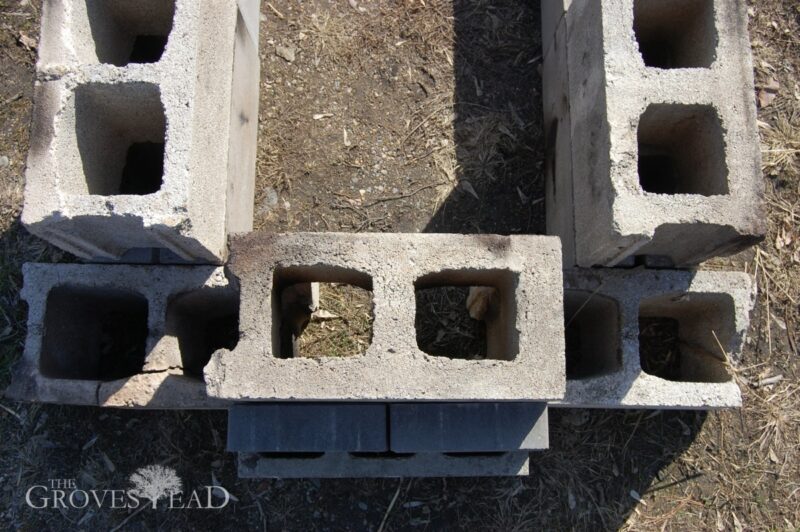
Step 4
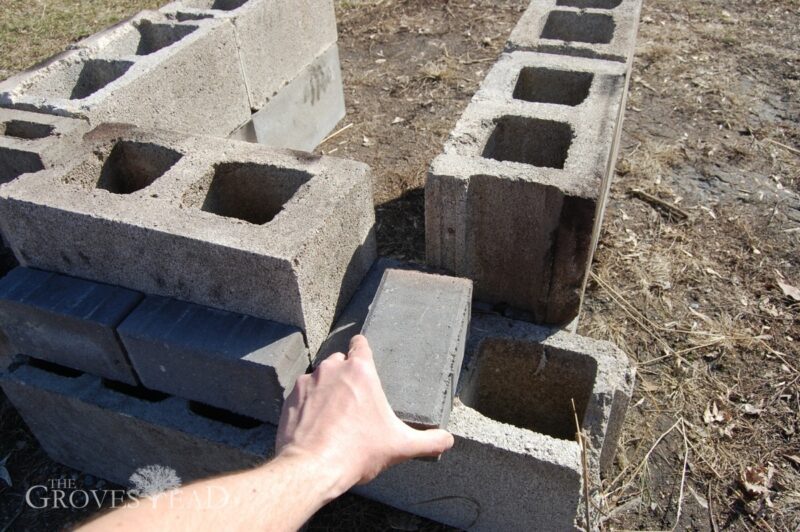
Use another block to cover the open space below the chimney block, and use a couple bricks to cover any gaps around the chimney. It’s not going to be airtight, but anything you can do to contain the fire and keep it on the pans will improve efficiency (less fuel, faster evaporating).
Step 5
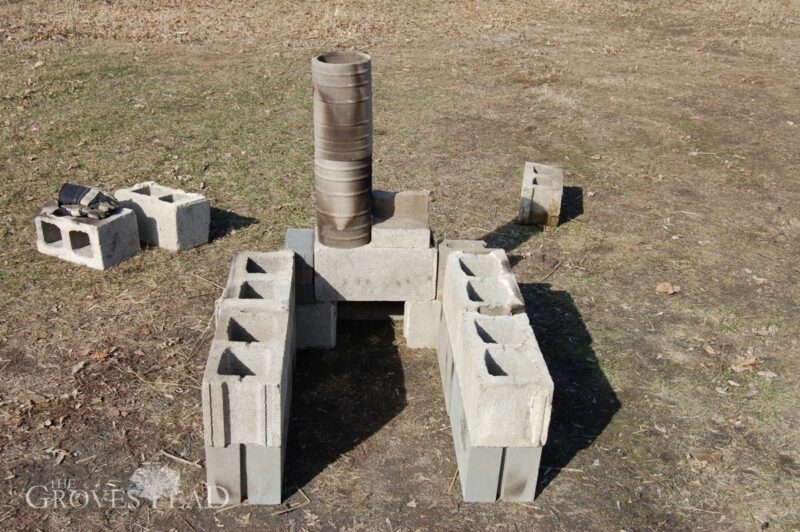
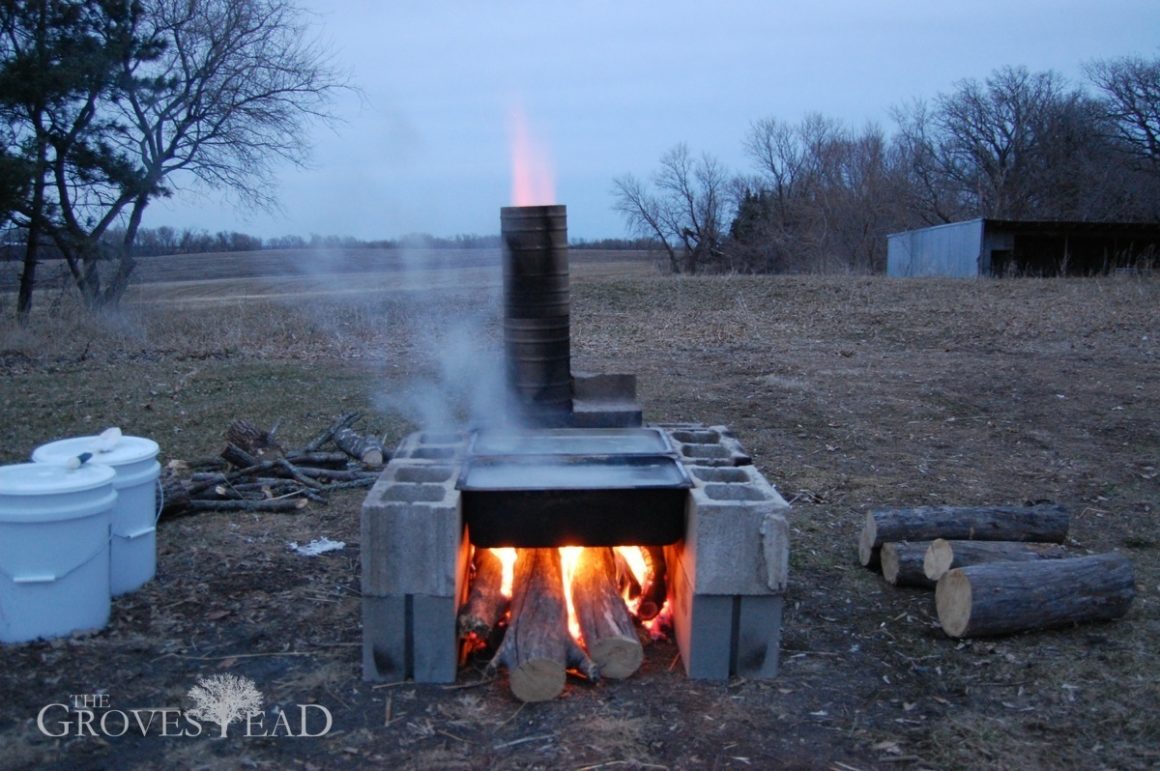
Create a chimney flue at least a couple feet above the top of the chimney block. I used old tiling we found on the property. But you could use any kind of ducting or even a few more concrete blocks stacked vertically. The idea here is to vent the exhaust away from the pans. Simply boiling the sap over an open fire would cause a lot of ash and soot to land back into the sap.
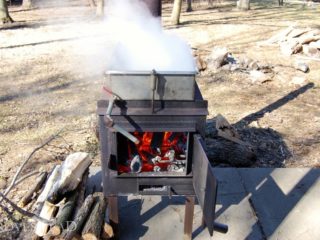
Just beware, the exhaust coming out will be extremely hot! As you can see from the flames coming out of the top on the first photo — it looks like a jet engine!
Enjoy the fire!
Finally, light a fire and pull up a chair. I usually wait a good 20-30 minutes before I have enough coals to put the pans on and start boiling sap. After that I just keep feeding the flames. It always amazes me how much fuel it takes to evaporate sap.
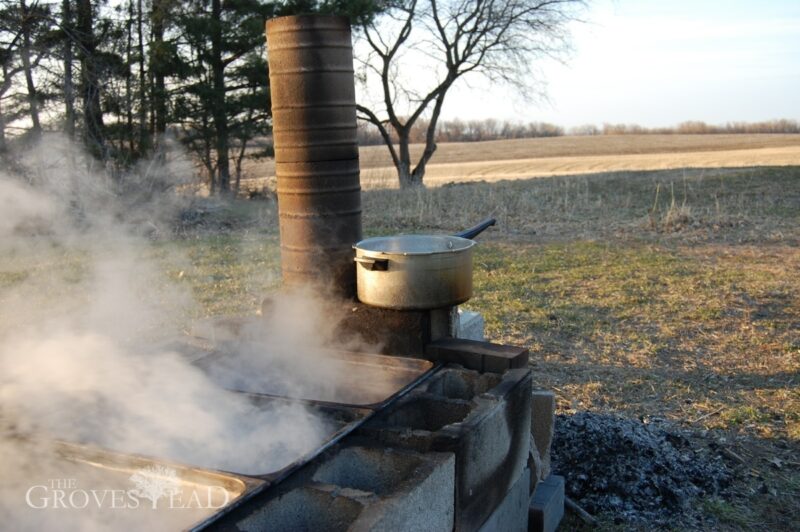
I can shave a little time off the process by pre-warming sap in a separate pan over the second chimney hole. Just keep in mind you’re boiling away 98% water, so it’s going to take awhile. In my experience, it takes about an hour to boil 5 gallons.









23 comments
This is so great! My in-laws live by a lake and want to tap their trees next year. I told them I needed to connect the two of you, but now I can send them right to this fabulous blog! Way to go Groves!!
Tree-tapping season is fast approaching! I’ll be posting about it here as we get closer.
Rory,
You comment that you’re boiling 5 down five gallons an hour, in 5.5 gallon (22 quart) buffet pans. So, in the top photo 10 gallons per hour, and the bottom 15 gallons per hour. I’m looking for confirmation to this statement as I just spent the last 10 hours boiling down 10 gallons and am only finishing on the stove as I type this. I was using a 5 gallon turkey boiler on a propane stove, adding sap dripping from a gallon can, so I imagine the limited surface area is what sucked up my time.
Please advise. I ordered my buffet pans yesterday and began to assemble my furnace today, much like you have pictured here.
Thank you in advance,
Matthew.
Hi Matthew, yes you’re on to it. The turkey boiler doesn’t provide enough surface space to evaporate efficiently. The perfect evaporator would be a mile wide and an inch deep, so to speak. But the buffet pans are a good compromise. To achieve the 5 gal per hour it really has to be a vigorous boil, and that’s difficult to do with wood. And I would recommend getting some flue venting with a damper — you don’t want as much heat escaping through the chimney as what I pictured here. And the third pan does not automatically equal 3 x speed. Usually the fire is not as hot over that pan and it doesn’t boil as evenly. So I’d say 2 pans = 3-5 gallons per hour, 3 pans = 5-7 gph.
Thank you for your reply.
I’ve done twenty gallons in my new pans in the last two days and cut my time down significantly, three hours per 10 gallons, excluding finishing indoors for 15 mins or so. My fire is not hot enough I’ve ascertained. I’ll keep tweeking the process, as I’m sure all maple syrup makers do.
Look forward to hearing how your season is going.
-Matthew
Great job documenting this. I built a similar set up with 2 x 6″ deep pans.
The pans weren’t cheap, but definitely a cheaper option than a maple pan. I did my first trial last night with moderate success. Certainly better than previous setups.
My issue was that my pans started to warp ( I kind of expected some of that). What I hadn’t thought of was the paradox of needing to keep more sap in the pan to prevent more severe warping, but…then in turn, needing more fire heat to boil extra sap.
Did you come across this issue? I can’t unwarp the pans, but to prevent this overheating I had to find a balance. I went a little crazy with the fire at first I think, after that I built coals and only added enough to keep it boiling.
Damper comment was a good point, I ran into that as well. All the flame was being sucked right up the pipe. Might reduce one length of pipe to see if that reduces the pull.
Took roughly 4.5 hrs to boil 10 gallons after work, however I know that can be improved as I ran into issues on maintaining boiling temperature.
Interested if you had any other methods to reduce risk of warping. It’s a finicky process all around, but addicting.
Get Maplin’!
Hi Ben,
Thickness of the pan is going to be the biggest determinant to warping. Those 20-gauge buffet pans are very thin and warp easily…not much to do about it. Thicker steel won’t warp as much, but require a lot more heat to keep a boil. I’m experimenting this year with a much larger pan (24×48″), and I expect to run into warping issues.
Just wanted to say thanks for the post. It inspired me to do it. So far, 3.25 gallons from 130 gallons of sap. Tomorrow will be the last boil of 2018. Forecast of 52 and sunny with 65 gallons to boil. Here’s hoping.
Wow! That is a huge amount of sap on a homebrew evaporator. I did 150 this year. Lot of work!
Rory, this my second year boiling sap. I plan to set up a cinder block type station to boil- going to turkey fryer, then indoor burner at the end. A couple questions, #1-did you have issues with blocks breaking due to heat? Am thinking of lining with fire brick maybe? #2-I don’t have flat pans, will have to use stock pots…am I better to make a open type grid on top or find a large piece of flat metal for top to set pans on? Thanks!
Hi Cathy-
#1 – Yes, the blocks will crack due to heat but not necessarily during evaporating. They will mostly fall apart when you try to move them later. Firebrick will help. I switched to solid concrete block 4″x8″x16″ — no holes, half the width. They worked great and did not crack after 4 runs this year.
#2- You’re going to have a lot of trouble with stock pots. You want the entire bottom surface exposed to the heat with all the smoke going out the chimney. Otherwise you will get ash and soot in your syrup and it just won’t get as hot. Also, the goal is surface area: you want as much sap exposed to the heat and open air as possible to maximize evaporation. I usually only keep the pan filled with 1-2 inches of sap with a constant dribble of fresh sap from another pan. Buffet pans are a great way to get started (you can buy as many as you can afford). If you are going to do this every year consider investing in a custom pan made for evaporating. You can find these on craigslist for $100-300, ranging from 18″ to 48″ in length.
Did your blocks dry out and crack?
Hi Tony, yes the concrete blocks don’t last very long, especially if you try to move them. I switched to solid-filled concrete blocks, half the width, and they held up very well this year. No cracking after 4 runs.
I’ve been wanting to get into small scale maple syrup making at a lower cost. This looks like a great option. Thanks for sharing!
Each time you boil are you then waiting for it to cool before moving the pans?
No, you want to move it to the finishing pans without cooling down, because you will need to heat it back to boiling to finish the syrup. The more it cools, the longer that will take.
Hi. I just stumbled upon your site the other day, and I tried building something like that, but I didn’t create enough draw. How did you get that chimney piece to stay there and not blow away or fall off? Is is secured somehow?
That chimney piece is two pieces of old field tile made of cement. You could also stack more concrete blocks or, more preferably, buy a 5 or 6-inch vent pipe piece for a wood stove and a collar and cement screws to anchor it to the top block. I use a modified version of this same setup now.
B-Vent or stove pipe:
https://www.menards.com/main/heating-cooling/venting/black-stove-pipe/black-stove-vent-pipe/10108214bb/heating-cooling/venting/black-stove-pipe/black-stove-vent-pipe/10106483lq/p-1444432213610.htm
Collar:
https://www.menards.com/main/heating-cooling/venting/gas-appliance-venting/amerivent-reg-b-vent-storm-collar/3esc/heating-cooling/venting/gas-appliance-venting/amerivent-reg-b-vent-storm-collar/6esc/p-1444432084134.htm
Just evaporated 40 gallons this weekend.
Cool, thanks much. I ended up with a lot of ash in my sap (this is my first season doing this, so I am learning by trial and error….mostly error). Is that why my finished product is more gray than brown? Have you ever seen that? Can I heat it back up and try filtering again? I filtered it twice through double cheese cloth layers, and a lot of black soot was captured, but the syrup is still grayish. I would eat it if it’s safe, but I am not sure what to do. Thanks for any advice you can give!
Mike-
The lower your chimney the more ash you will get, that is certain. I moved the setup into a small shed a few years ago and cut a hole in the ceiling for the chimney to pop out. Now I hardly ever deal with ash/soot. But a taller chimney (at least 6 ft) will help tremendously in lieu of a sugar shack. As for the gray coloring .. hard to say. You might have sugar sand, which is lighter in color and might appear gray. Any particles will stay suspended in the syrup for a few days and eventually settle at the bottom. More filtering will help with this. I like to use dish towels instead of cheese cloth. The very thin kind. They can filter a lot more than cheesecloth. But whether its ash or sugar sand its harmless to consume, as long as its not bad-tasting. There are actually health benefits to consuming a little bit of ash/charcoal from time to time (eg, activated charcoal).
More about sugar sand:
https://www.motherearthnews.com/real-food/how-to-filter-pure-maple-syrup-zbcz1902
Thank you for being there and being so responsive! I really appreciate all the help!
Rory, do you have an updated design/implementation and the 3, 5 or 10 takeaway pitfalls to previous and current implementations of your work. I’m fascinated by your simplicity, necessity, and determination. Hope to hear back of a blog or post, video or otherwise on the ‘ultimate after 10 years doing this’ for the DIY evaporator fanatic. TY for your efforts, and continued responses over the years. Kind regards, Dave O.