


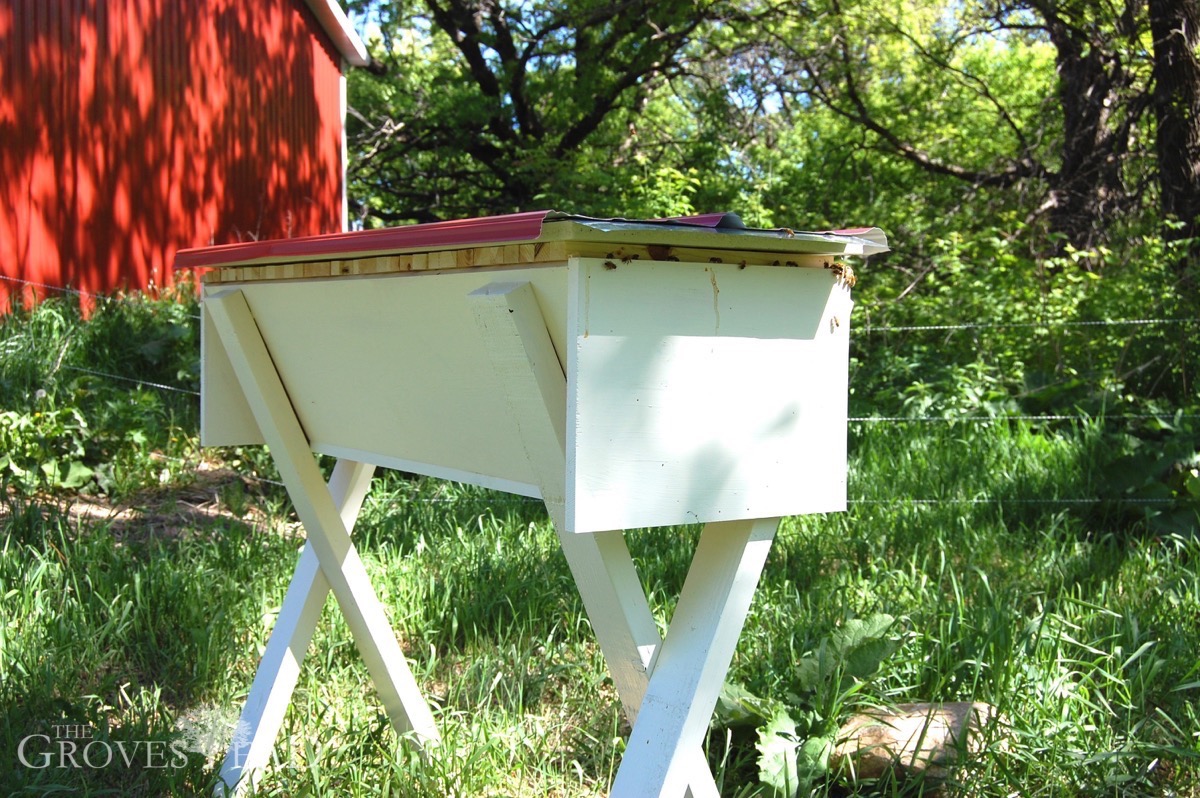
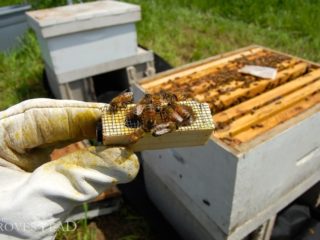
We’re trying a new style of beehive this year called a top-bar hive. It’s new to us and most American beekeepers but is actually a very old style. It predates the common Langstroth box-and-frame hives by many centuries and is common in many parts of the world.
The main advantage is simplicity. There are only two components: the trough and flat pieces of wood (bars) that rest along the top of the trough. There is no wax foundation, bottom board, feeder frames, entrance reducers, etc, which makes storage and cleaning much simpler. It is also makes much less expensive and easier to build. Whereas a starter setup for a Langstroth hive consisting of two deeps and a super can easily surpass $300 or take weeks to build from scratch, a top-bar hive can be built in a day for less than $50, and often less than that if you have scrap materials on hand.
The main reason I wanted to build a top-bar hive was that I didn’t like how invasive the Langstroth hives were to maintain. It’s easy to inspect the top box of a Langstroth hive, but if you need to go any deeper, which you often do to find the brood, that means ripping apart an intact colony. Other beekeepers may not mind it, but I’m not so sure about the bees. After two consecutive total losses each season using Langstroth, I wanted to try something different.
In a top-bar hive the box (or trough) is much longer, usually about 4 ft, and the bees build continuously in one horizontal run. Harvesting honey and inspecting brood can be done with minimal disruption. Check on the brood on one end of the hive, look for honey on the other. There are some drawbacks. Most harvesting equipment is designed for Langstroth frames so extracting honey at the end of the season will be more difficult. But at this point I just want healthy bees so I’m not so concerned about harvesting.
I based my design on the Kenyan Top Bar Hive. Expert beekeeper Michael Bush describes how to build one on his site. I highly recommend Bush’s website and books to anyone starting out beekeeping. His advice is rooted in practice and he has a lot of sage advice to share.
Materials
- (2) 1×12 pine boards (cut to 4′ or desired length)
- (1) 1×6 pine board cut to same length
- (2) 1×12 cut to 15″ for the ends
- (1) Any material for lid cut four inches longer and wider than the trough dimensions for a 2″ overhang (eg, 52″ x 19″)
- (30+) bars cut 15″ by 1.5″ wide. Number of bars varies depending on how long your hive is. 48″ inside would require 32 bars.
NOTE: Michael Bush suggests making both 1.25″ bars and 1.5″ bars, the former being better for brood and the latter being better suited to honey. In this case, you could cut 16 1.25″ bars and 18 1.5″ bars. - (30+) pieces of triangular corner moulding cut to 13″ to create a starting guide for the bees.
Steps
1. The first step is to decide how big of a hive you want to build. There is no required size, however most top-bar hives are around 4 feet.
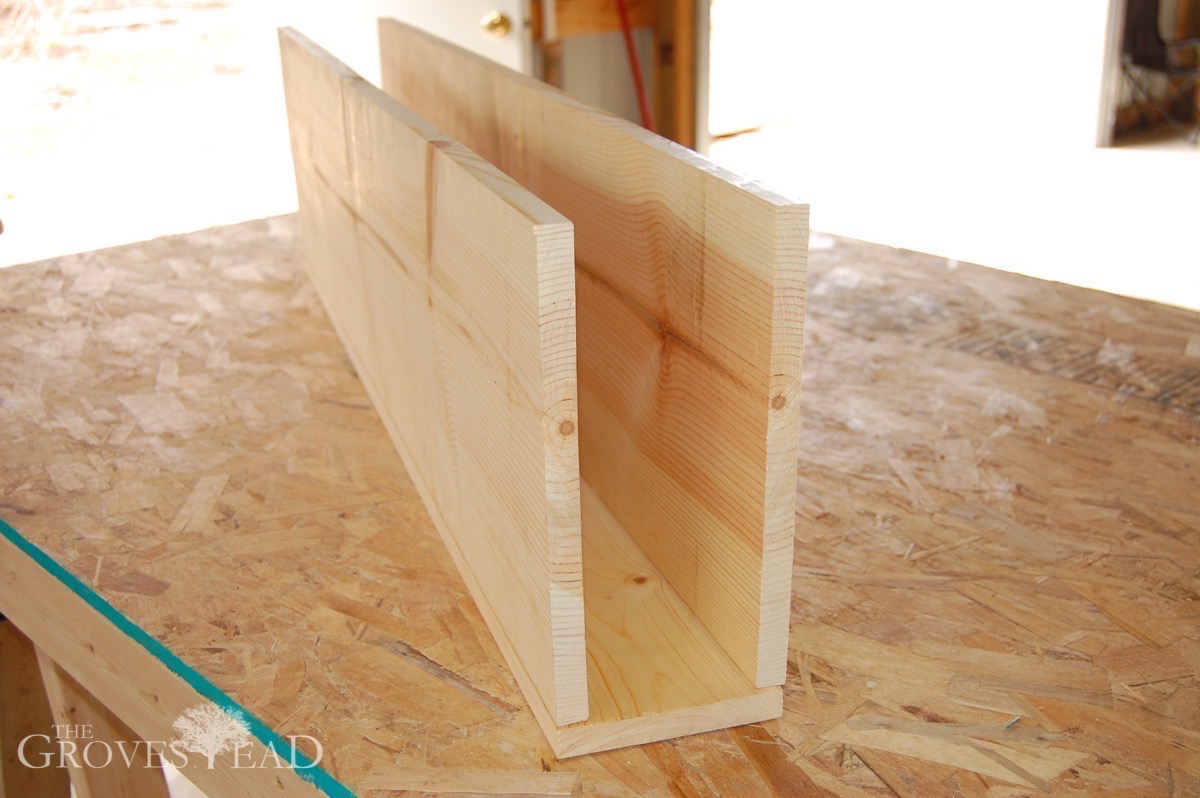
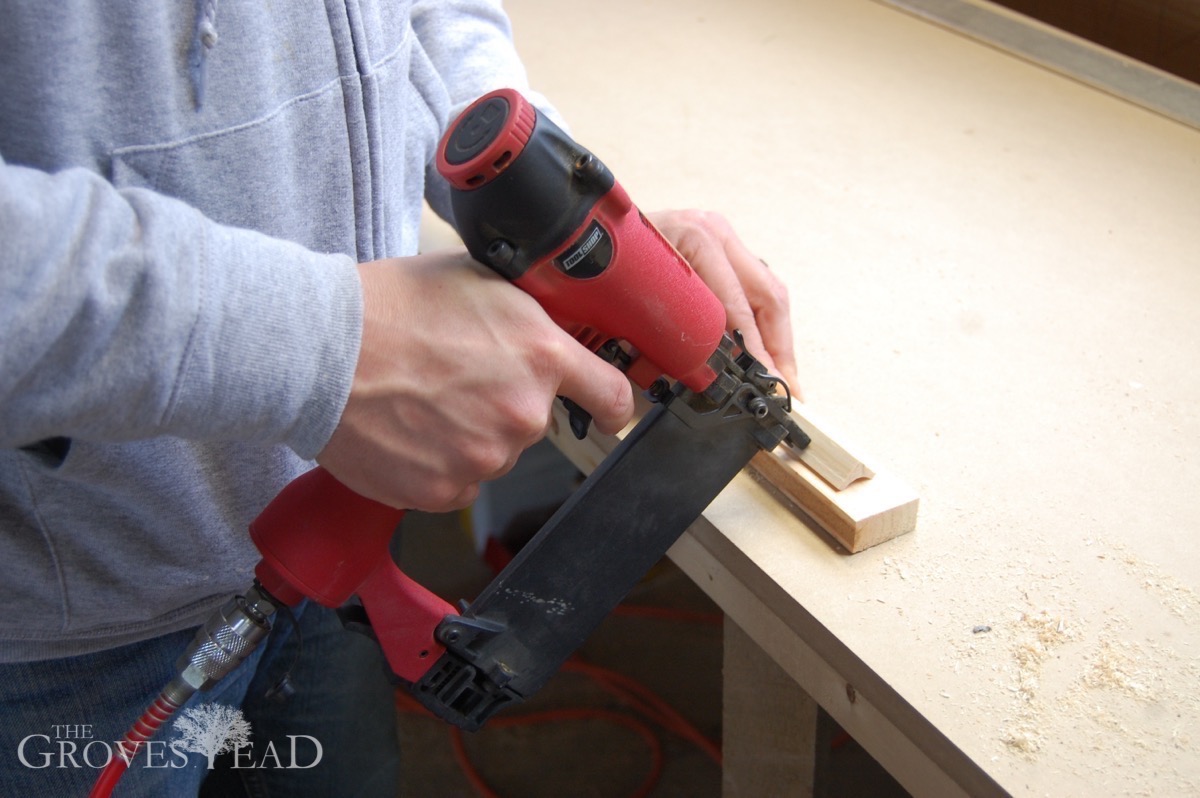
2. Use a finishing nail gun (or finishing nails) to mount the 1×12 pine boards to the inside top of the 1×6 bottom board.
3. Next, pry the 1×12’s outward until the tops are about 15″ across.
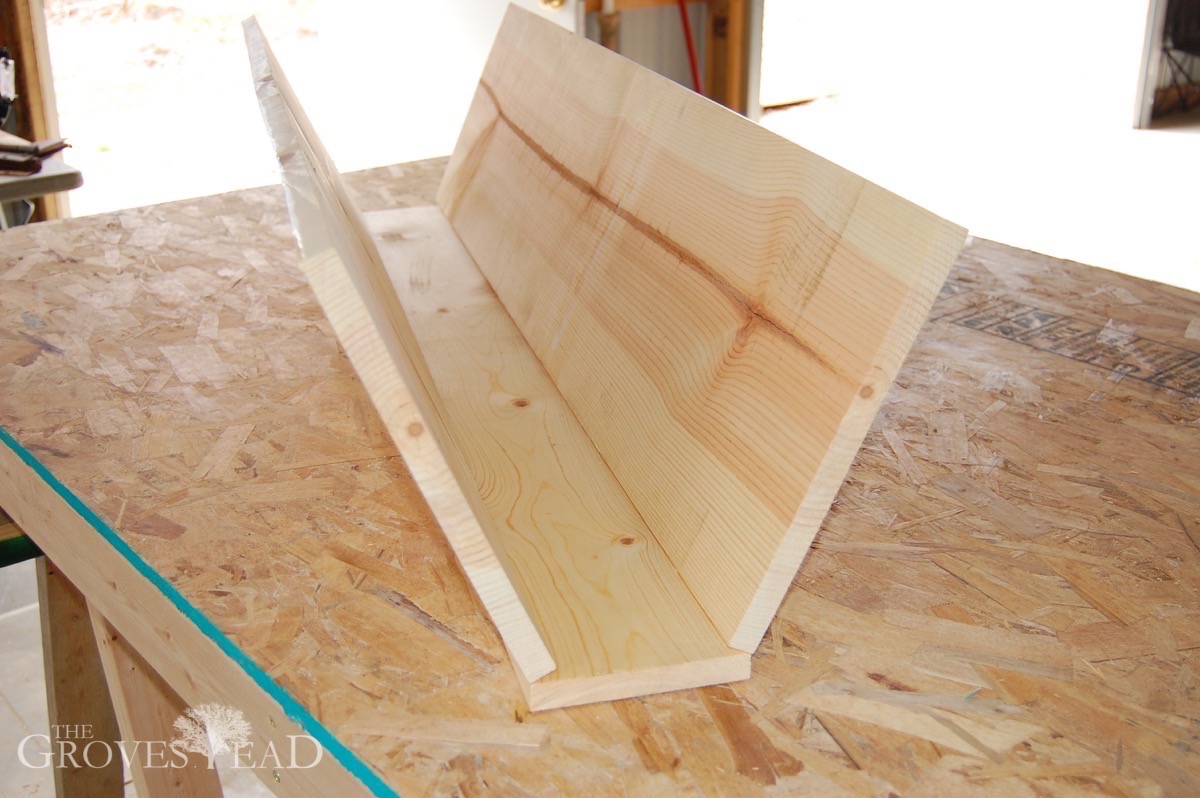
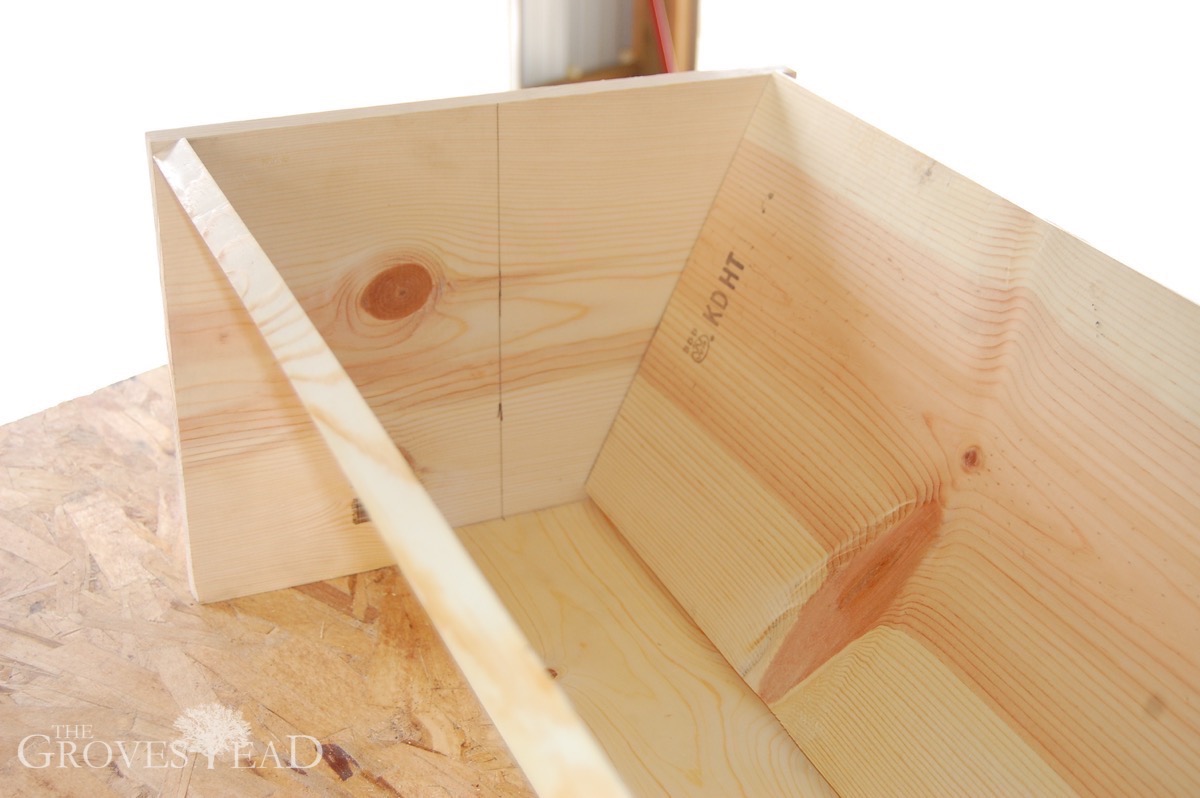
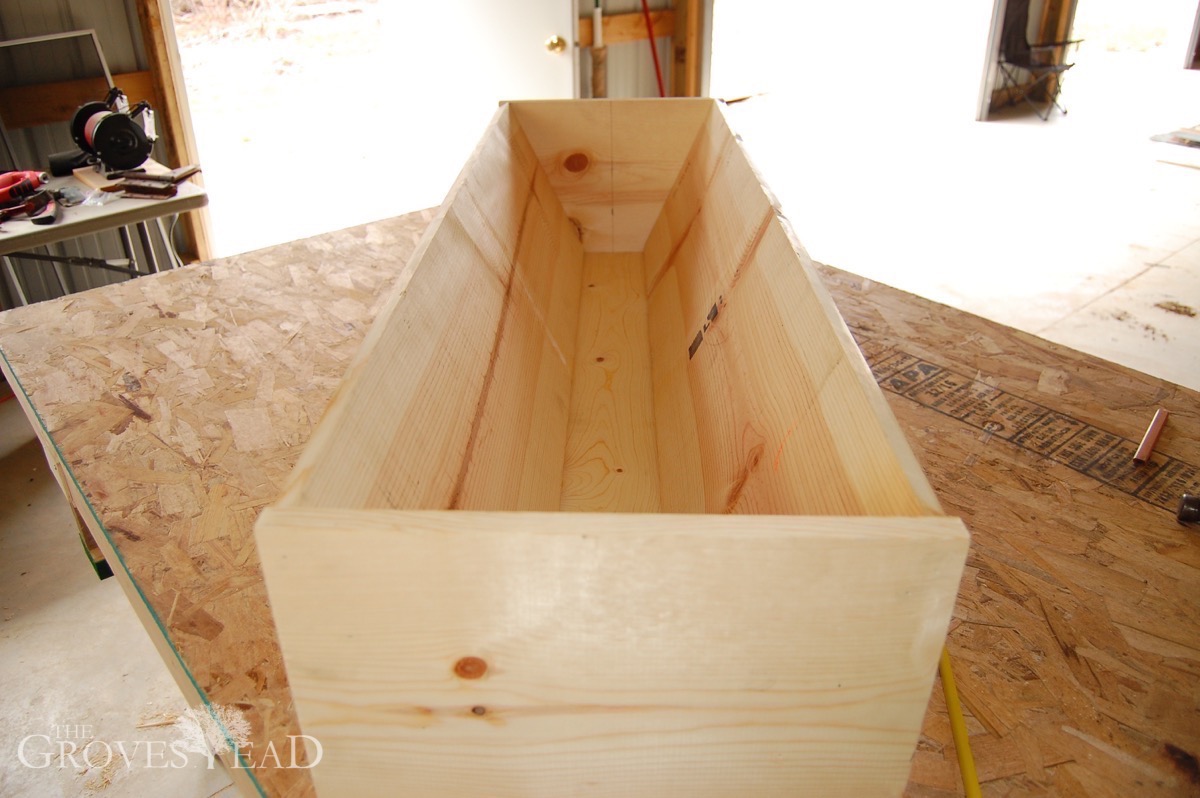
4. Nail the 1x12x15 end boards onto the ends of the 1×12 sides.
5. Next, make your bars. Decide how many of each bar you want to use (1.25″ or 1.5″) and cut. This was the only time-consuming part for me. Since I didn’t have a table saw, I had to re-measure each piece I cut, clamp on a guide and cut with my circular saw.
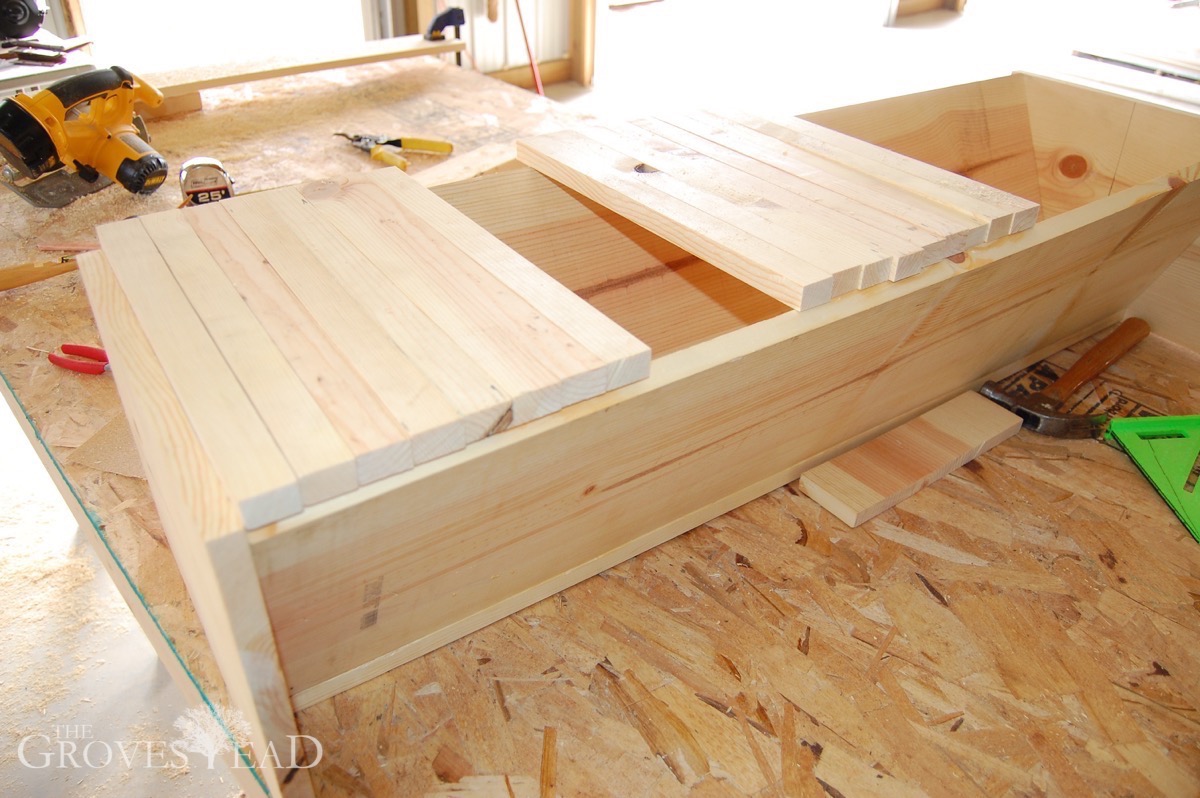
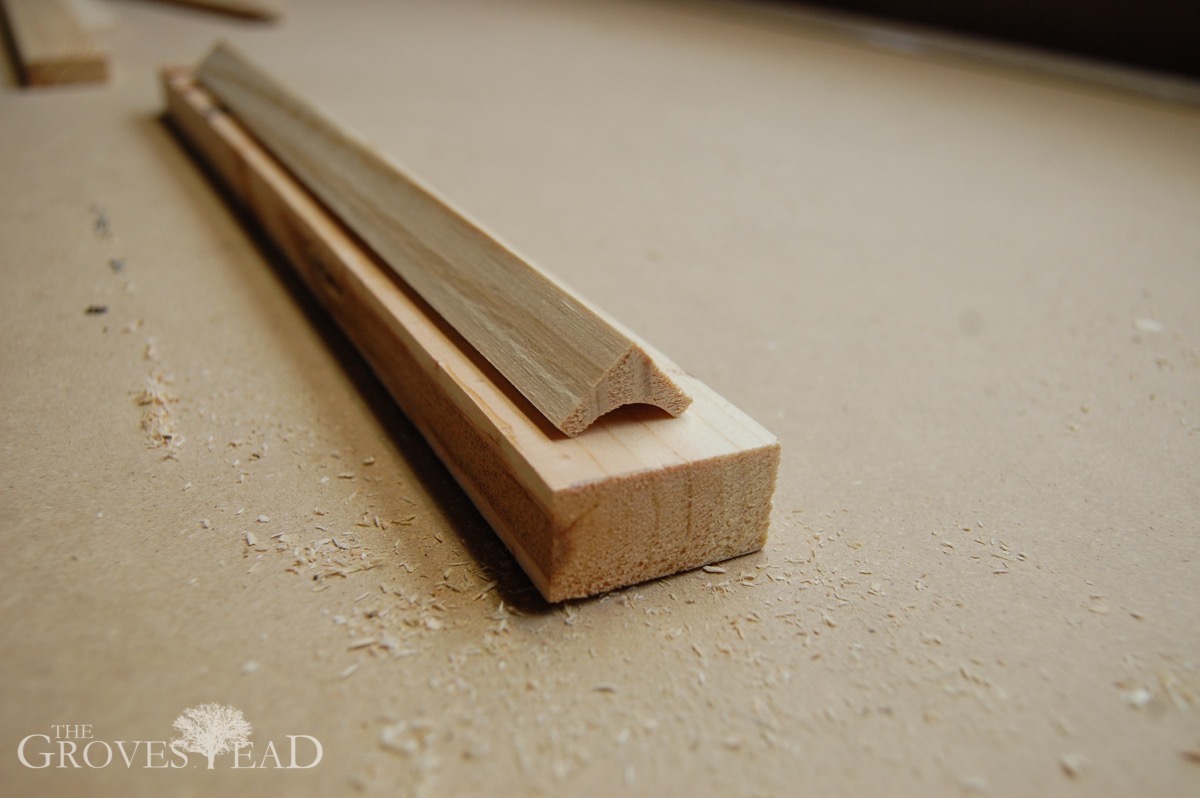
6. After you have your top bar pieces cut, it is highly recommended to add some triangular corner moulding (or you can make your own) so the bees have a guide on which to start their comb. The guide will also act as a stopper to keep the bar from sliding out of place. Center the guide on the bar and nail or glue in place.
7. (optional) Create a “Follower” board to keep the bees contained to one side. Generally, bees prefer the smallest space necessary to build their hives. Using a Follower board, you can gradually expand the space available as needed, instead of starting them out in a cavernous box.
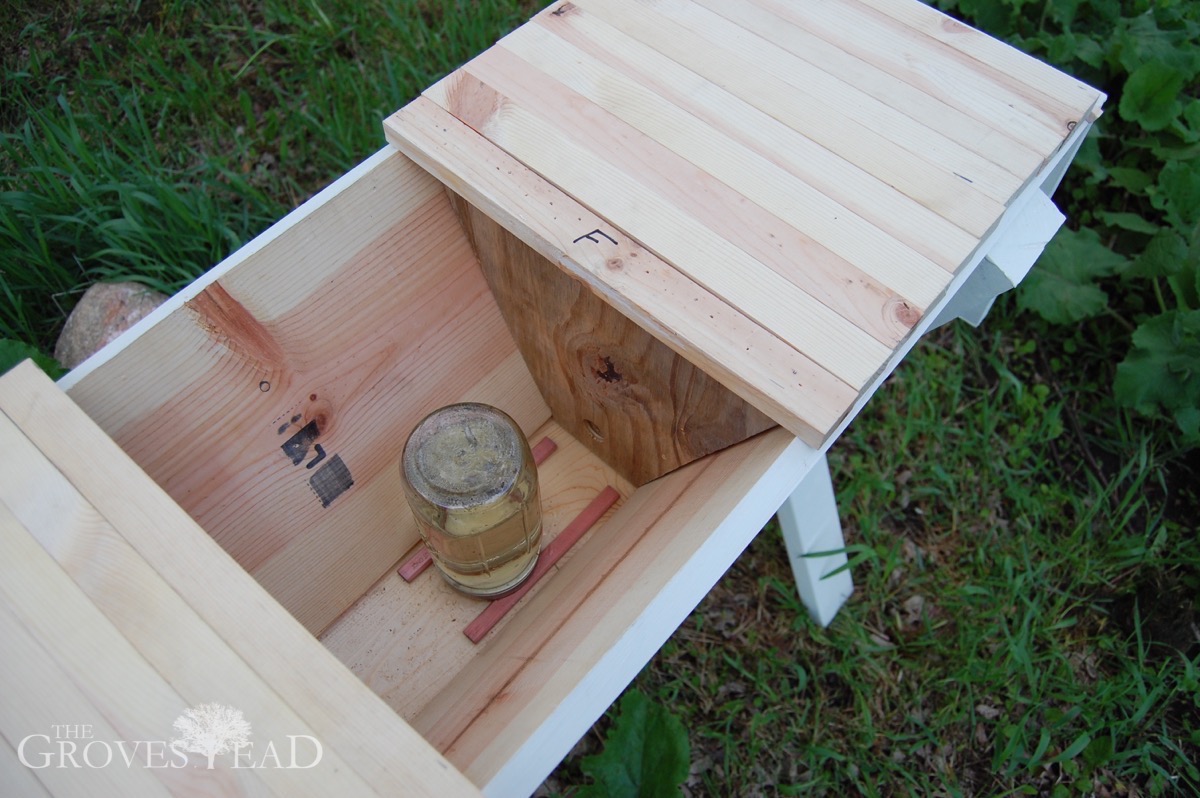
Cut a triangular piece of plywood or pine or whatever scrap wood you have left. The piece will need to be about 11″ tall, ~13″ wide at the top and ~4.5″ at the bottom. It does not need to be air-tight. Nail the board to the bottom of spare bar.
My Follower board doubles as a food compartment. I drilled a 1″ hole near the bottom and keep a sugar water feeder just behind the Follower. This placement is ideal because its next to the brood chamber but inaccessible to robbers (other bees that come to steal honey and syrup). Also, since it is not a frame feeder, I don’t lose any bees to drowning.
8. (optional) I found it difficult to avoid smooshing bees every time I replaced the lid. As soon as bars are removed to inspect, bees crawl on top of the bars and its hard to get them all off before replacing the lid. I solved this problem by adding small strips of 3/8-inch wood on the underside corners of the lid. Now when I set the lid down there is only a small area where the bees might get crushed and its easy enough to keep clear.
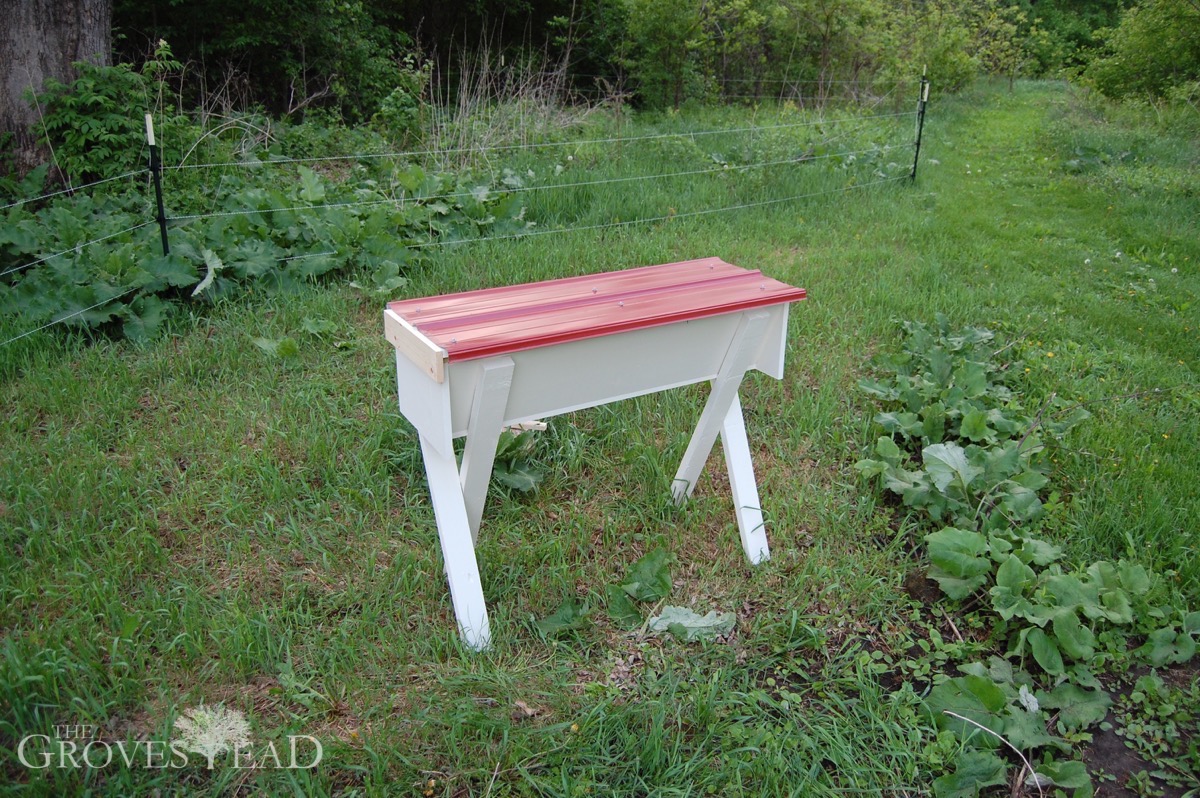
9. The hive is now complete. Add 2×4 legs to desired hight, paint, add your lid and you’re ready to go!
Top Bar Hive Entrances
A note on entrances. I followed Bush’s advice and did not drill any holes in the sides of my TPH. Instead, I leave a 3/8-inch gap before placing my first bar. I actually nailed a 3/8″ spacer in front of the first bar so I don’t inadvertently close the entrance when removing the lid. The big advantage of a top entrance rather than a bottom one is that it 1) keeps out rodents and other predators and 2) provides better ventilation, as warm air naturally rises.
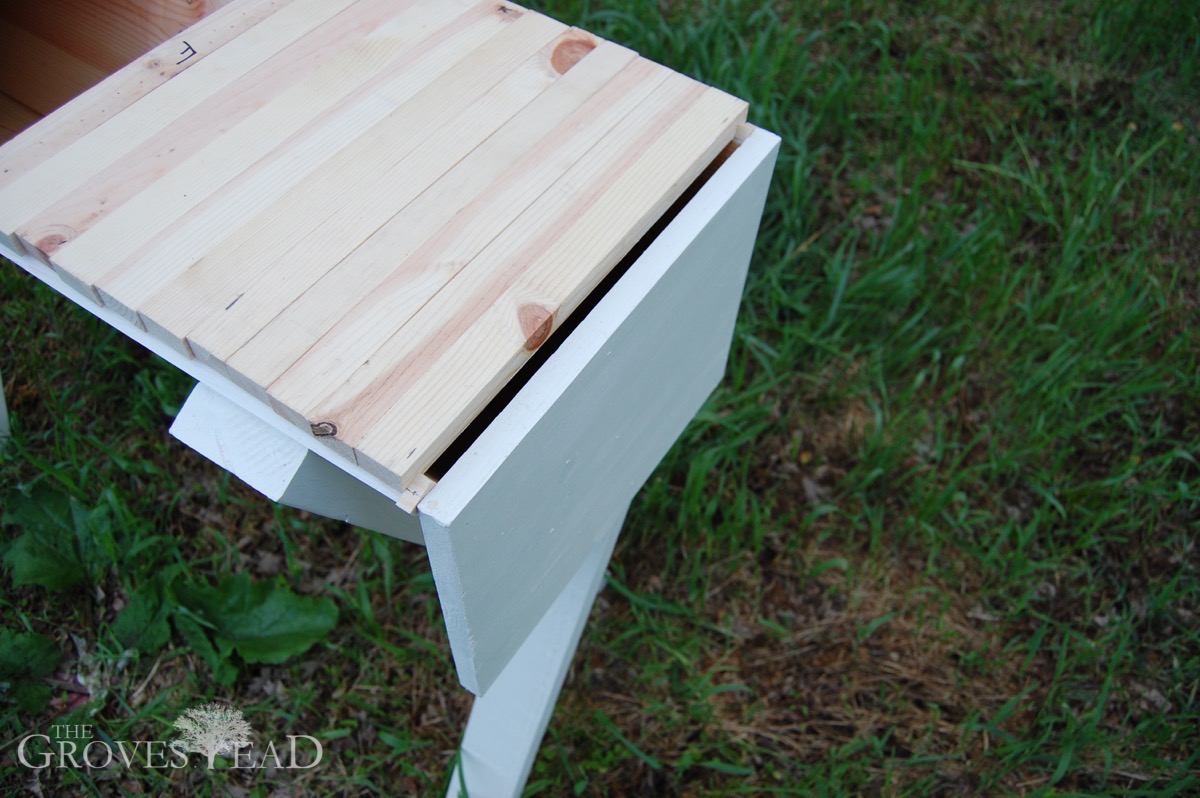
When the lid is placed over the bars it rests 1″ above the entrance and leaves a perfect gap for the bees to come and go.


9 comments
How did your hive do for the first year?
Hive did great, but the bees did not. A huge summer storm blew the hive over and all the frames & bees fell out. I tried to restore as quickly as possible but the bees did not survive. Upgrades (including better anchoring) are planned for this spring.
Just snooping around after listening to the Generations interview with Kevin Swanson.
I built one of these hives several years ago and they are next to worthless here in MN. You need taller frames. Go with the Layens hive: http://www.horizontalhive.com/ and then also look to Kirk Webster for management practices: https://kirkwebster.com/a-beekeeping-diary-introduction/ I strongly endorse building your own equipment. I use scrap pallet wood from where I work. Just about any machinery manufacturing place has pallet wood that they may even be paying someone to haul it off. Just ask!
The strategy in beekeeping is to propagate your bees so you can stay ahead of the losses. I think the real money in beekeeping is in selling nuc colonies. The honey is just a byproduct.
Alexandria, MN
No argument here. I certainly have spent enough dime on nuc colonies.
Hey Rory,
Thanks for the detailed piece. I have an idea and would like to run it by someone more experienced. I currently have the Langstroth but have found the heavy lifting to be a major concern, especially for my wife. However, I very much like the manner in which the Langstroth is especially designed for honey production (which is the main reason we keep bees).
Here’s the idea: Since our focus would still be honey production, I am thinking to build a top bar hive and then add a guide frame (foundation?) complete with the wiring. The dimensions of the frames would remain those of the Langstroth, except for tapering the sides to fit the shorter bottom end. I imagine that in this way, I’d be able to fit the frame in the Langstroth honey extractor (which I happen to own), extract the honey and return the frame right back into the hive, with the comb intact.
What do you think?
You can simply build a horizontal Langstroth hive. Space the side boards for standard frames and build the box that way.